Learning how to install an inverter safely at home is not only about connecting wires. It is about protecting people, appliances, batteries, and the entire electrical system. An inverter can supply useful backup power, yet it can also create dangerous heat, sparks, or electric shock when installed carelessly. Small errors matter.
This guide explains How to install an inverter safely at home through practical preparation, correct cable sizing, secure connections, ventilation, grounding, and careful testing. It considers the manufacturer’s instructions, the inverter’s power rating, battery chemistry, and local electrical requirements. A qualified electrician should inspect or complete any work involving household wiring, transfer switches, or uncertain connections. Never rely on appearance alone. A tidy cable route may still hide an undersized conductor or loose terminal.
Safe installation begins with a clear workspace, insulated tools, protective equipment, and a verified shutdown procedure. The inverter should sit on a stable, dry surface with enough airflow around its vents. Batteries need extra attention because they can release intense current, even when the inverter appears switched off. Check polarity twice. Then check it again.
Some instructions seem simple but deserve reflection. A diagram may not match every home, battery bank, or inverter model. Experienced installers can still overlook a warm terminal after the first test. That is why measured voltage, tightened connections, temperature checks, and documented results are more reliable than confidence. This introduction sets the foundation for a careful, evidence-based installation that values safety over speed.
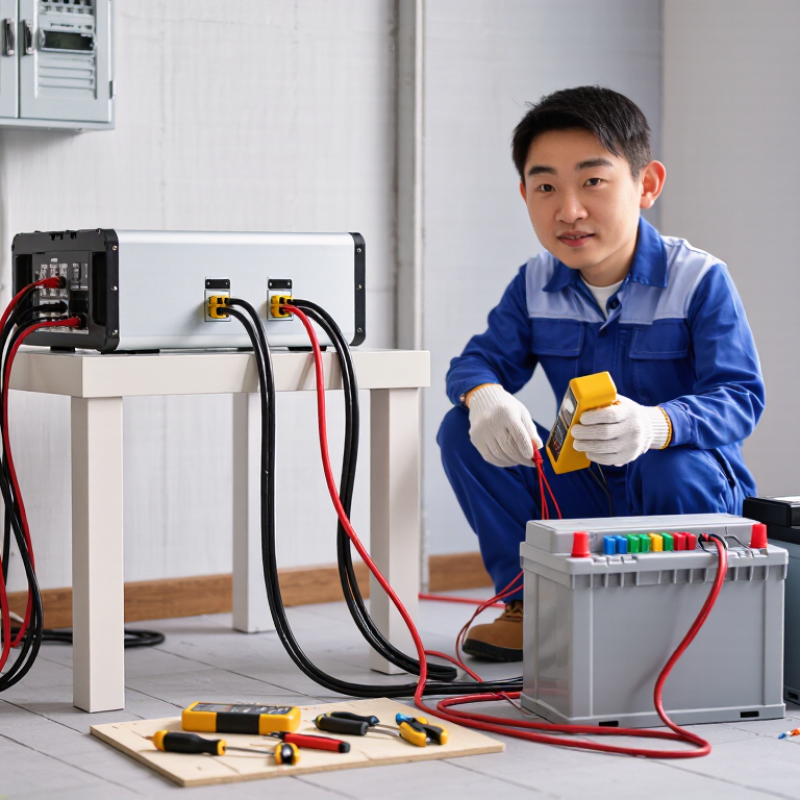
Understanding Home Inverters and Their Safety Requirements
A home inverter converts direct current from batteries or solar equipment into alternating current for household appliances. Understanding this process matters before learning how to install one safely. The inverter is not simply a box with cables. It can produce dangerous voltage, store substantial energy, and overheat when overloaded.
Safety requirements begin with correct sizing and placement. Choose a dry, stable, and well-ventilated location away from curtains, water, and flammable materials. Use cables rated for the expected current, secure every connection, and provide proper grounding. A separate disconnect switch can help isolate the system during maintenance. Never connect an inverter to household wiring in a way that could send power back into the public grid. A qualified electrician should inspect fixed connections and confirm compliance with local electrical rules.
Tips:
Read the installation manual completely. Check polarity with a suitable meter. Wear insulated gloves and eye protection. Keep batteries away from heat and metal objects. Leave ventilation space around the unit. Do not guess cable sizes. Even careful homeowners can misunderstand a diagram, especially when several power sources are involved. I would rather pause and ask a licensed professional than rely on confidence alone. Test the system under a small load first, watch for unusual heat or noise, and stop immediately if either appears.
Assessing Electrical Loads, Wiring, and Installation Conditions
Why Learn How to Install an Inverter Safely at Home?
A safe inverter installation begins with a realistic load assessment, not the appliance label alone. The U.S. Energy Information Administration reported average residential electricity use of 10,791 kWh in 2022. That equals roughly 29.6 kWh daily, but household demand changes sharply during the day. Refrigerators, pumps, and compressors may draw brief starting surges. A heating appliance can create a heavier continuous load. List each device, its running watts, starting watts, and expected operating time. Do not guess the surge requirement. Guessing is an expensive weakness.
Wiring conditions matter just as much as inverter capacity. The conductor size must match the current, cable length, insulation rating, and installation environment. Undersized cable can heat inside walls, especially during prolonged high loads. The National Electrical Code and IEC 60364 series provide recognized guidance for overcurrent protection, grounding, isolation, and cable selection. The EIA’s 2020 Residential Energy Consumption Survey also identified space heating as the largest household end use, at about 42% of total energy consumption. That figure shows why heating loads deserve separate attention.
Inspect the installation location carefully. Keep the inverter dry, ventilated, accessible, and away from combustible storage. Check moisture, dust, heat, wall strength, and clearance before drilling. An electrician should verify polarity, earthing, protective devices, and voltage under load. A test that passes at idle may fail when a motor starts. My own planning habit would include a margin above the calculated demand, though the exact margin depends on local rules and equipment instructions. Recheck every assumption. That is where safer work begins.
Why Learn How to Install an Inverter Safely at Home?
Assessing connected loads helps determine inverter capacity, cable size, circuit protection, and installation conditions before work begins.
Safety note: The values are representative nominal loads. Check the appliance nameplate and include startup surges from motors and compressors when selecting an inverter. Installation should comply with local electrical codes and be performed by a qualified electrician.
Choosing the Right Inverter, Batteries, and Protective Equipment
Choosing the right inverter begins with the home’s real electrical demand, not its advertised maximum. List refrigerators, pumps, lighting, and starting currents before selecting capacity. A 3,000-watt inverter may fail when a motor briefly demands twice its running power. Pure sine-wave output is usually safer for sensitive electronics. Check conversion efficiency, idle consumption, surge rating, and compatibility with the battery voltage. The IEA reported that global battery-storage deployment reached about 42 GW in 2023, more than doubling from the previous year (IEA, Batteries and Secure Energy Transitions, 2024). Growth is rapid. Selection errors are common.
Battery choice requires equal care. Lithium-based systems offer high usable capacity, but they need a suitable battery-management system and correct charging limits. Lead-acid batteries remain practical for some budgets, although ventilation, weight, and limited discharge depth matter. Never mix batteries with different ages or chemistries. Calculate usable energy, not only the label capacity. A 5 kWh battery may provide less after reserve limits, temperature effects, and inverter losses. I sometimes see homeowners oversize the inverter and undersize the battery. That mismatch wastes money.
Protective equipment should include correctly rated fuses or breakers, a battery isolator, overcurrent protection, grounding, and surge protection. Install cables with the correct cross-sectional area, secured away from heat and sharp edges. Follow applicable IEC 62109 and IEC 62477 safety requirements, plus local electrical rules. A residual-current device may be necessary, depending on the system design. Do not improvise here. NFPA research continues to identify electrical distribution equipment and wiring as major contributors to home fires, making inspection and competent installation essential (NFPA, Home Structure Fires, 2023). My own planning can still miss unusual loads, so testing under realistic conditions remains necessary.
Installing and Connecting an Inverter Safely at Home
Installing and connecting an inverter safely at home begins with understanding the entire electrical system. Check the inverter’s voltage, power rating, and installation instructions before touching any cable. A unit designed for one battery voltage may fail dangerously with another. I have found that rushed planning causes more problems than difficult wiring.
Choose a dry, well-ventilated wall away from heat, water, and flammable materials. Leave clear space around the vents. Turn off every power source, including batteries, solar input, and utility power. Confirm isolation with a properly rated meter, not just a switch position. Connect cables with correct polarity, secure terminals firmly, and use suitable fuses or circuit protection near the battery. Loose connections can become hot enough to damage insulation.
Grounding must follow local electrical requirements. An electrical professional should inspect fixed household connections, especially when the inverter can supply existing circuits. Never connect an inverter to a wall outlet or backfeed the utility supply. That can injure workers and damage equipment. After installation, test the system gradually with a small load. Watch for heat, unusual sounds, warning lights, or a burning smell. Stop immediately if anything seems wrong. My own checklist would include one more pause: read the manual again after wiring, because confidence can hide a simple mistake.
Testing, Maintaining, and Troubleshooting the Inverter System
Why Learn How to Install an Inverter Safely at Home?
Testing, maintaining, and troubleshooting an inverter system require patience and careful observation. After installation, check cable polarity, terminal tightness, and grounding before applying power. Use an appropriate meter to measure battery voltage and output voltage. Compare readings with the inverter’s manual, not guesses. Keep hands dry, and disconnect all power sources before opening any cover. A qualified electrician should verify unfamiliar wiring and local code requirements.
Maintenance prevents small faults from becoming expensive failures. Inspect terminals for heat marks, looseness, or white corrosion. Clean dust from ventilation openings with a dry, soft brush. Listen for unusual buzzing, clicking, or fan noise. I have learned that a quiet system is not always a healthy system. Review warning codes and record voltage readings during normal operation. If the inverter shuts down, remove extra loads and check battery condition first. Do not repeatedly restart it without finding the cause.
Tips: Keep a simple test log. Label cables clearly. Leave airflow space around the unit. Never bypass a protective device. If a smell of burning plastic appears, switch off the system safely and seek professional help. My own mistake was ignoring a slightly warm terminal; it later needed tightening. Small signs matter.
Conclusion
Learning how to install an inverter safely at home begins with understanding how the system converts stored battery power into usable electricity and why correct installation is essential. The process involves evaluating household electrical loads, checking wiring capacity, ventilation, moisture levels, and available installation space, and identifying any conditions that could create overheating or electrical hazards. Selecting a properly rated inverter, compatible batteries, suitable cables, and protective equipment is equally important for reliable performance.
This guide explains how to install an inverter safely at home by outlining careful connection procedures, correct polarity, grounding, circuit protection, and safe isolation from other electrical sources. It also covers system testing after installation, routine battery and cable inspections, ventilation checks, and basic troubleshooting when warning signs appear. Because electrical work can be dangerous, anyone uncertain about testing or connections should seek assistance from a qualified professional and follow applicable safety requirements.

 Sriram Electricals